5.2.2 Job List Menu
Once the job is created you can manage various ways. The final destination of a job that is correctly done, is to reach Finished status.
You can also Delete or Archive a job if you wish you.
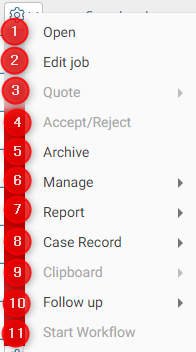
Below are various job options are explained.
|
|
|
Not all options will be visible at all times. Some options will be visible only when the jobs reach a certain status. |

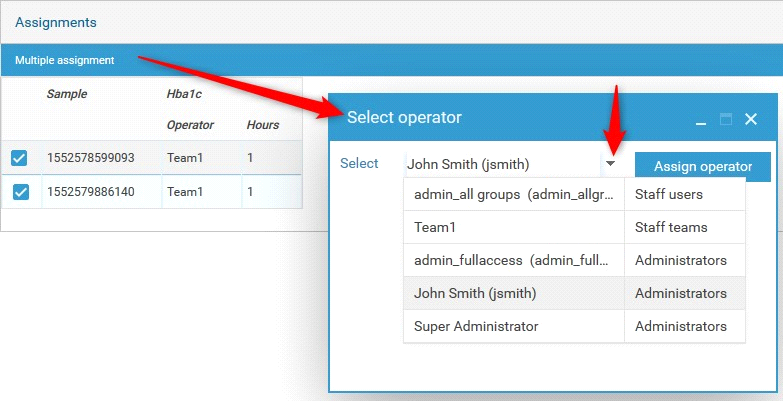
By default, the job is assigned to the operator that you selected in the test configuration. Before entering results, you can assign the job/samples to another operator. You can do it sample-by-sample or in batch with multiple assignment. Click on the Options button of your job/test, go to Manage > Assignments. Select the samples of interest, click on Multiple assignment and choose the new operator in the popup.

To start a job, expand it in the Job List and select your sample of interest by going to Options > Open. Details are displayed in a new pop-up; select an operator and complete any other required/optional job fields, then click on the Save & Start button to begin work on the sample.
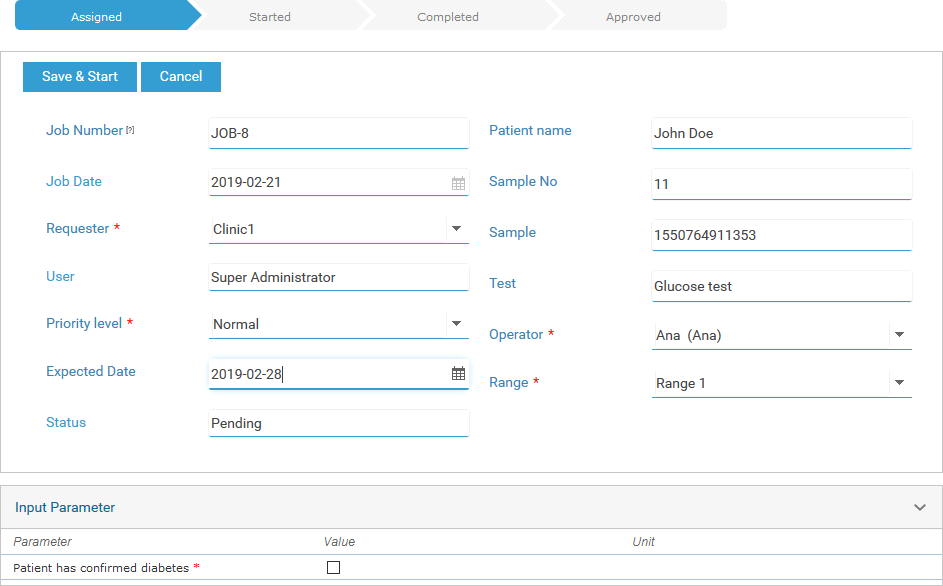
In the lower portion of the popup there are several items that might be required to complete when starting some jobs:
- Input parameters: Lab designated parameters as input for a job. These can only be input at the time of starting a job.
- Reagents & Supplies: Lab designated reagents and supplies associated to the job/test/assay. These can only be input at the time of starting a job.
- Protocol: list of protocols and equipment categories for the job. The equipment may be selected and the protocol can be downloaded and/or viewed. These can only be input at the time of starting a job
Mandatory fields are marked with an asterisk.