10.1 Storage Browser
We have created an example based on above freezer.
To see the freezer created above, go to ADMIN -> TOOLS -> STORAGE BROWSER.
To create Stages/Racks and boxes simultaneously in Freezer click on  .
.
*Read our KB on add new drawer or rack with the box.
Now you can create Boxes inside the racks. See section 3 before creating racks.
*Please read our KB to know more about how to create a box.
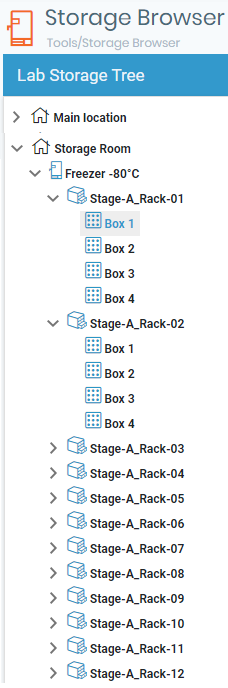
Like the same way above, you can create different facilities (rooms) and different equipment and racks and boxes inside them.
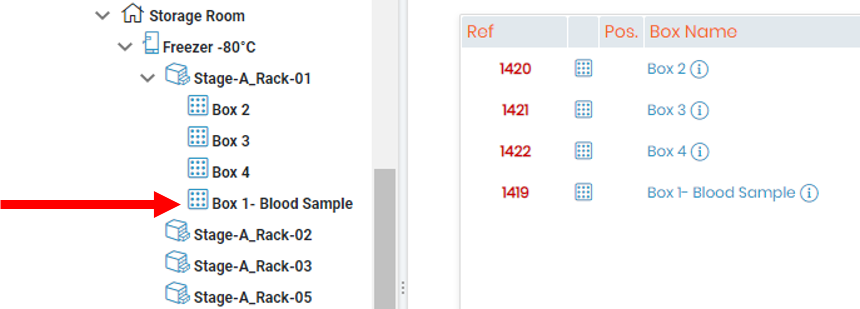
Storage browser arranges racks and boxes according to alphabets and name size (number of characters including spaces). Make sure to name the racks, boxes keeping this rule in mind.
*NEW: In LabCollector v6.01 automatically replaces spaces with underscore.
- If you assign position to your racks then they will be arranged according to the position and not alphabetically or name length.
*Box with no position are considered as 0 hence they are assigned first, but according to their name/numerical in the name.
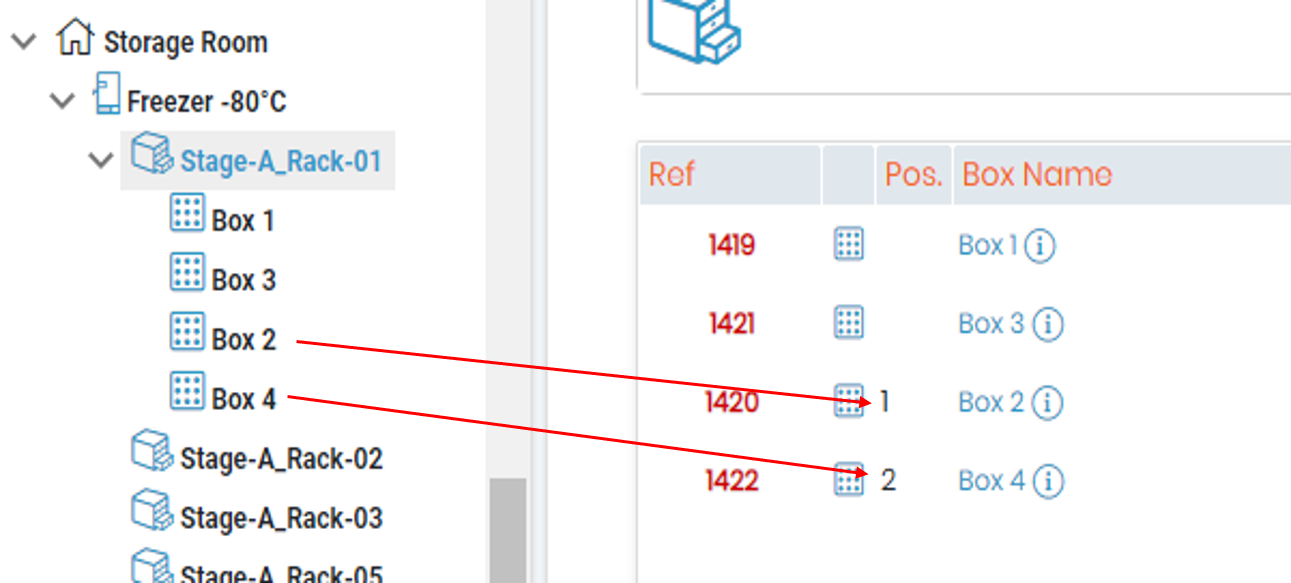
- Storage tree takes into account the character length. Small names are arranged first and bigger latter.
*Characters counting include spaces, numbers, alphabets and special characters.
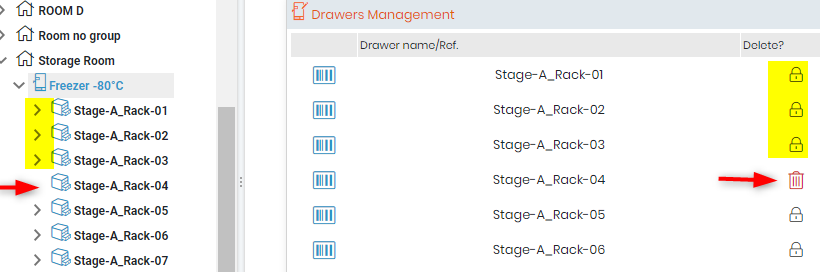
- Take care not to create boxes inside racks before carefully adding all racks. Because once the boxes are added the racks/drawers cant be deleted.
In the below image the rack with no drawers has a delete button but racks or drawers with boxes have a lock button and cannot be deleted.
*It is possible delete boxes and then delete racks.
 Tips/Hints
- It is better to replace the spaces by underscore _ or a dash - sign. Stage_A-Rack_01
*In LabCollector v6.01 automatically replaces spaces with underscore.
- Avoid using special characters in the front of the name of racks or drawers or boxes. For example, *Rack 1.
- If you have 100 racks in your lab then its better to start from Rack 001, as it will keep all your rack/drawers/boxes number in double digits and the length of the characters same throughout.
- First add all the racks to see if they are arranged properly and then add boxes inside racks.
For detailed information please read  section 6.